Pork Belly Lechon

When I was back home, I constantly reminded myself of my schedule. I may or may not leave so soon, I realized. There was really no fixed date, no pressing matter to attend to.

Then came the invitation for dinner, around a week after Jad’s funeral. We (my friends/classmates) haven’t really had a chance to talk about things out in the open. The situation was a delicate one. But the dinner had to happen. Naturally, I hosted it, and played the part of the cook. It’s a part I like to play because I think cooking for people who matter is on the list of things that feed my soul.

I didn’t want it to be complicated. My dinners have never tried to be uptight and I want it to stay that way. I love my people, and maybe that helps.

And I love pork. Strokes of brilliance on this blog have always involved pork, one way or the other. When I was thinking about what to prepare for dinner, a glorious way to feast on pork was on my mind.

And this, my friends, is glorious (if I do say so myself).
 photo P1520746_zpscb0b6140.jpg
 photo P1520786_zpsed14003a.jpg
 photo P1520789_zps6870d9dd.jpg
Porchetta was on my mind when I was preparing my list. I’ve always wanted to make it, and I did get a chance to witness how it’s done when I was in school. But I also found myself craving for lechon while I was home. Mom would relent and come home with a small package of chopped up pig for me. That may have happened more than once.

I thought about taking a nice slab of pork belly and drowning it in the typical lechon aromatics (minus the calamansi because I don’t like it). Roasting it on low for a few hours makes it dastardly fork-tender, and during the last hour of baking, cranking the heat up will yield a crackling so divine.

The result blew me away. There is no breakthrough, no secret technique, no new flavor. I just made damn good lechon, and that for me, was a new notch in my belt. And if I’m being corny here, I’d like to call it “pinoychetta”. I’m also clever like that.
 photo P1520757_zps65468844.jpg
All in all, I had two more attempts just to prove the first one wasn’t a fluke. The first one was a trial-run (my mom and her office mates were the lucky ones). The second was for the dinner, and the last was the big bang before I left.

The dinner itself was great. They loved the pork. Because they’re my friends, naturally they had to sing praises.
 photo P1520867_zpscb81e313.jpg
 photo P1520830_zpsfd9ccfca.jpg
 photo P1520887_zpsb60452e5.jpg
They were fed well, we talked until we had no more stories to tell, and one of my friends, Jam, received a birthday cake a week early. It was a heavy chocolate cake with coffee buttercream, studded with shards of almond praline. I didn’t bring my piping tips so I was rubbish with the rosettes, but they liked it.

It was also passed around for posterity and the July babies went nuts. Somehow bearing the brunt of loss seemed lighter, even just for a night. I haven’t laughed so hard in a while.

So this pork is a thing of beauty. It’s not something you would whip up on a weeknight (but I’m not stopping you!). Reserve a weekend. Prepare this on Saturday, wake up early on Sunday to start roasting it. By lunchtime, you feast and the next day, you fast.
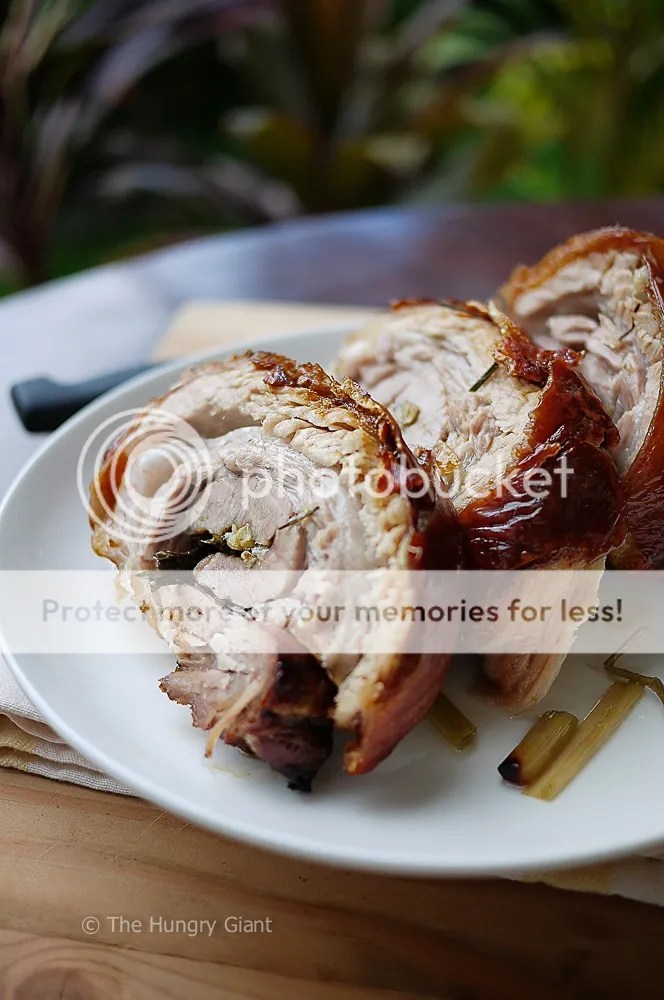
 photo P1520777_zpsca9bddf0.jpg

Roasted Pork Belly “Lechon”

  • 1.5 kg pork belly slab, skin on
  • 3 whole garlic bulbs, peeled and roughly chopped
  • ½ cup oregano leaves, washed then chopped
  • 3 red onions, peeled and chopped
  • around 4 – 5 lemongrass stalks, sliced
  • the zest from 1 lemon
  • juice from 1 lemon
  • a little over 1/8 cup salt, plus more for an even rub around the pork
  • 4 tablespoons crushed black pepper

Combine all the aromatics in a bowl and mix well. Lightly mash everything together with the back of a spoon. Alternatively, use a food processor to bring everything together with only around 2-3 pulses.

With the skin side down, rub the mixture all over the meat. Roll the slab, carefully invert the meat and secure it with butcher’s twine (and lemongrass leaves, like what I did). It’s okay if there are a few pieces of herbs that fall off, you can place it back later. Rub coarse salt all over the meat, including the skin. With a paring knife or fork, poke the skin of the meat. This will ensure a nice crackling. Transfer it to a roasting fitted with a rack and the bottom lined with foil. Place it in the refrigerator to chill overnight. This will dry the skin, which helps the crackling form.
 photo P1530270_zps416f36a2.jpg

 photo P1520800_zpsdbb0155b.jpg

variation: this will easily feed two – three

Preheat the oven to 160 C. Just to be sure, pat the skin of the pork dry with a paper towel. Roast the pork for 5 hours. Afterwards, increase the temperature to 220 C, and allow the pork’s crackling to form. This will take another 30 minutes to an hour. When done, remove from the oven and allow to cool a bit before slicing. Enjoy!
 photo P1520711_zps4222bd9c.jpg
 photo P1520742_zps83176931.jpg

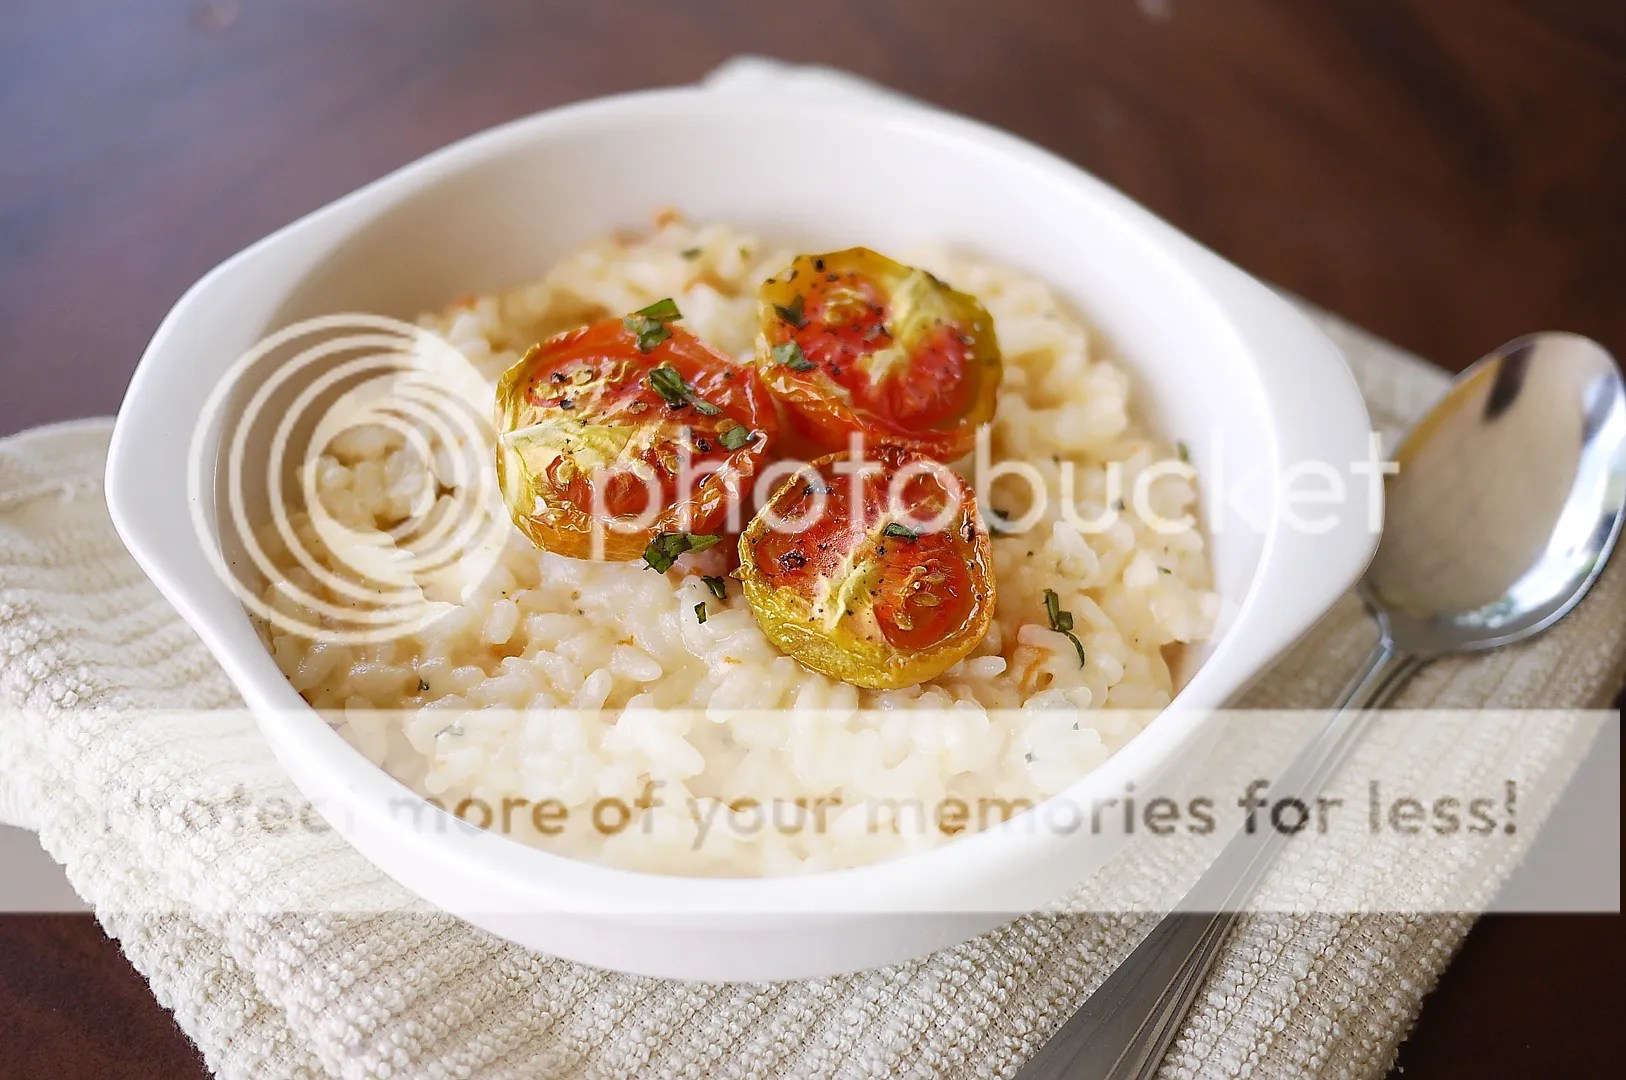
Roasted Garlic and Tomato Risotto

I’d like to believe I’ve come a long way since my first botched attempt at risotto. If there’s one nugget of wisdom cooking school has given me (actually I’ve learned so much in three months!), it’s how to cook risotto the right way. It’s actually a simple process, albeit a little meticulous. Tasting the rice via random sampling to make sure everything is cooked al dente is essential. But it can be done. I don’t think I’ll botch it ever again.
Photobucket
I never realized we had a box of arborio sitting in the pantry here at home until we used the exact same stuff in school for our kitchen lab. Hey, everything was in Italian and I was too lazy to google a translation so I never attempted to use the stuff. I’ve been known to buy and keep a lot of useless stuff, or things that I only use once. Fortunately, that isn’t the case with the arborio.
Photobucket
I hit two birds with one stone today. Roasted tomatoes are a treat: sweet and tart and definitely great. I had it with pasta once and it was a home run. Today I had it with risotto and of course, another home run. Roasted garlic and tomatoes add a nice depth of flavor to the risotto, and finishing it off with parmesan is the icing on the proverbial cake. This plate of risotto will accompany a savory meat dish (preferably beef) pretty well but today I just had it as it is and I’m not complaining. It doesn’t take much to make me happy, especially when I’m given a plate of something as good as this. I had it with ice-cold coconut water, and oh man, that worked for me. It really works.
Photobucket

Roasted Garlic and Tomato Risotto (serves 2)

  • 1 cup arborio rice
  • 2 – 4 cups warm chicken stock
  • half an onion, minced
  • 3 tablespoons olive oil, plus more for the tomatoes and garlic
  • 1 garlic bulb, top part sliced open
  • 5 tomatoes, halved
  • 1/4 cup parmesan cheese
  • salt and pepper to taste
  • fresh basil, chopped, for garnishing
  1. Preheat oven to 180 C/ 350 F. Arrange the garlic bulb and tomatoes in a pan (optional: with a silicone mat). Drizzle generously with olive oil and season with salt and pepper.
  2. Place it in the oven and allow to bake for 45 minutes – 1 hour, or until tomatoes are shriveled at the sides and the garlic has softened. When done, remove from the oven.
  3. Remove the garlic from their skins and mash with a fork. Reserve around three pieces of roasted tomato for garnish if desired.
  4. In a pan, heat olive oil over medium heat. Add the onions and allow to sweat. Add the rice and mix well to coat everything with the oil.
  5. Add the stock one ladle (around one cup) at a time. Allow the rice to partially absorb the liquid before adding in the next ladle. Stir everything together with a rubber spatula. Repeat the process until the rice is cooked to desired doneness (al dente).
  6. Add the garlic and tomatoes. Mash the tomatoes and mix everything together. Add the parmesan. Stir and season with salt and pepper. The risotto must still be creamy.
  7. When done, remove from heat and top with more parmesan, the roasted tomatoes and the chopped basil. Serve warm. Enjoy!

Spreading some goodness with McCormick

I love herbs. In fact, I have an herb garden growing a thousand miles away back home. I just hope that as of writing this, they haven’t died yet. Fingers crossed that my instructions haven’t fallen on deaf ears.

Before I dove into the practice of using fresh herbs, McCormick has always provided me with a good supply of dried ones to use in everyday cooking. My go-to selection would have to be basil, rosemary, paprika and thyme. It’s amazing that this company can do so much to introduce the world to a variety of flavors neatly packed with convenience, made available in your everyday go-to supermarket at reasonable prices. This time, they take it a notch higher by introducing their new line of…….wait for it…….SUNSCREEN LOTIONS.

Photobucket

spf 30 anyone?

I kid. McCormick, please forgive me, I just had to say it. But seriously though, who would’ve thought sandwich spreads could taste even better? Apparently they did. And here they are with their new line of Bread Spreads, which were launched at Fully Booked Top Shelf to a crowd of bloggers and media representatives.
Photobucket
Photobucket
Photobucket

Photobucket

rosemary lemonade (!)

Every table was provided with a generous serving of breads and crackers, together with the three Bread Spread variants: Pesto, Herb Parmesan and Garlic.
Photobucket
Photobucket

On bread, herb parmesan and pesto work best. Both have natural textures in the spread: parmesan and basil bits, respectively. The garlic wasn’t bad, on the contrary, it does taste pretty darn good, but we were impressed with the first two more.
Photobucket

Even if I was not impressed with the garlic on bread, I can imagine the garlic to work with meals like barbecue, fish and chips, even tempura-style vegetables. And just to prove how versatile these spreads can be, McCormick also invited Chef Stephanie Zubiri to demonstrate three dishes flavored with the bread spread line. Even if these 75-gram 0-trans fat squeeze bottles are geared particularly as an in-between for sandwiches, they can do wonders to flavor other dishes as well – think pasta, stuffed chicken breast, and naturally, salads!
Photobucket
Photobucket

Photobucket

Chef Stephanie Zubiri with host Patricia Hizon

Photobucket

Clockwise from right: Garlic Herb Lemon Zest Carbonara, Grilled Stuffed Chicken Breast with Roasted Veggie Millefeuille and Pesto Orange Salad with Balsamic Dressing

After the demo, a few lucky members of the audience were also treated to two games. The first one was a 20-minute team challenge to whip up three dishes using the spreads. The next one was easier – a sandwich tasting game where you had to guess what bread spread was used. All in all, people had a jolly good time.

Photobucket
Photobucket

Personally I’m excited to see how far I can stretch the Bread Spread’s versatility. You get the convenience of not having to worry about digging deep into a jar just to get most of the spread, the versatility of having another flavoring element in your mix of ingredient arsenals, and of course, the great flavor that the brand always promises.

McCormick Bread Spreads are now available nationwide and priced at 75php per tube.

Like their facebook page: https://www.facebook.com/friendsandflavor

Like ‘The Hungry Giant’ on facebook: https://www.facebook.com/thehungrygiantblog

Follow me on twitter: https://twitter.com/giooraay

9 mornings: Garlic, Pesto and Lemongrass Chicken

The holidays can be stressful. Here I am again, apologizing for an inability to post anything edible yesterday. I was supposed to share this recipe a few hours ago, but the holiday rush caught up with me and I was left out of breath.

At around 11 pm last night I finally filled all 60-ish cupcakes with peaches and strawberry jam for my mom’s office mates. This morning as soon as we got back from church, I perused one of my first ever cut-out recipe cookbooks (basically a drawing book with snippets of recipes from magazines to the back of a milk can) for simple buttercream frosting. Frosting a cupcake is murder on my self-esteem, since it’s always been a hit and miss with me and nicely piped frosting. I almost cried. No joke.
Photobucket

Then my friend R came over and brought her handmade gift boxes to put the little devils in. But as luck would have it, I forgot to tell her that I’ll frost the cupcakes so she didn’t take that into consideration when she made the dimensions (but still her boxes are really nice and I’ll probably post pictures next time). I can already imagine my mom’s officemates opening their boxes, and probably wondering why the top portion of the cupcakes are sticking to the lid.
Photobucket

Things like that happen. When you’re caught up with making sure everything’s perfect, most of the time it’s disappointing when you feel that the universe is against you. So this little project (“9 mornings”) didn’t really live up to the hype (that I just imagined in my head). But it’s not the end of the world (or is it?). Maybe if there’s something I got from this experience, it’s that you don’t have to force things to happen. Sure cooking involves patience, skill and technique, but without the love for all things edible, all you’re left with is a vapid, aseptic white plate.
Photobucket

This chicken recipe, which isn’t vapid at all, was made at the top of my head and I went along with whatever combination I was craving for. I was surprised at how good this was. The chicken meat practically fell of the bone and it was still tender and juicy. I’m definitely light-handed when it comes to seasoning with salt. The seasoning measurements aren’t really 100% spot-on but that’s why people invented liquid seasoning afterall.
Photobucket

Garlic, Pesto and Lemongrass Chicken (serves 6 – 8 )

  • 5 chicken thighs
  • 5 drumsticks
  • 1 head of garlic, roughly chopped
  • 2 – 3 stalks lemongrass, chopped into 2 inch strips
  • 3 tablespoons olive oil
  • 2 tablespoons bottled pesto
  • 1/2 – 1 tablespoon rock salt
  • a few dashes of freshly cracked pepper, to taste
  • for seasoning the chicken: salt, pepper and red chili flakes to taste
  1. Preheat oven to 200 C/400 F.
  2. Clean the chicken pieces well. Pat dry using a paper towel. Arrange pieces skin side up on an oven-proof dish. Season with salt,  pepper and red chili flakes.
  3. Make the paste: Combine garlic, lemongrass, pesto and olive oil in a bowl, making sure that everything is mixed well. Season with salt and pepper.
  4. Tuck the paste under the chicken’s skin and try to distribute the paste well. If there is leftover paste, rub it on the chicken pieces.
  5. Bake in the oven for about 45 minutes to an hour or until chicken skin is browned. Flip the pieces over to brown the other side. Bake for another 10 – 20 minutes.
  6. When chicken is brown and tender, remove from the oven and serve hot with a steaming bowl of rice. Enjoy!

Photobucket

Gambas/Shrimps in Garlic Butter

I like the word ‘rustic’. Usually food bloggers like myself hide behind this word when we plate something without the frills and post it on our blog. Somebody from the Food Network said rustic means it doesn’t have to look pretty. I have to agree. Relative to some bloggers out there who have been given plates made by God, let’s just say I’m still getting there.

If you’ve been reading my blog for a while now, you must have surmised that I take my food seriously. And as much as I love eating, I also equally enjoy the process of making food look good in photos. Sometimes I might produce something……well not really ugly, but I doubt that what I’ve made would whet appetites. Have I come a long way? Hell yeah. But there’s still a long way to go. I’m learning and I’m drowning in inspiration.

As a newbie, I enjoy the magic moments when everything just falls into place perfectly. The moment where you don’t have to force anything out of the food to make it look artificially good. It just does.

Who can say anything bad about shrimps, garlic and butter together? That’s a magic moment right there. This dish goes by a lot of names. Here in the Philippines we call it gambas. You can call it garlic shrimps. We can call it delicious anytime. It’s rustic because it’s simple. It’s not perfect, but it doesn’t have to be. I never should be.

I also made this for my Mama Eng. She’s my aunt who’s been with the family since before I was born. She survived taking care of three incredibly demanding baby boys, one of which is now 20 years old. It was her birthday yesterday and we thank God for the day she came into our lives. Hypertension and diabetes prohibits her from indulging, but for gambas, I think she made an exception.

For good measure, I sliced a pan de sal, brushed it with the gambas oil and toasted it. Rice? You don’t need it. When you serve gambas with toasted bread and allow the bread to absorb some of the fragrant and equally toasty sweet oil, it’s heaven. Heaven.

It was also the perfect time to practice my Masterchef (haha) skills. Jennifer, season 2 winner, said that shrimp heads can really add flavor to a dish. 

Gambas/Shrimps in Garlic Butter

  • 1 kg large shrimp
  • 2 tbsp olive oil
  • 1/8 – ¼ cup salted butter (one block is 1 cup; half of it lengthwise is ½ cup – I used ¼ cup but adjust to your liking)
  • 1 tbsp gin (optional)
  • 1 head of garlic, minced
  • 1 white onion, sliced
  • 1 eight inch lemongrass stalk (optional)
  • A dash of thyme, paprika, chili flakes
  • Salt and pepper to taste
  • Reserved shrimp heads (around 4)
  • 1 pan de sal (or your preferred bread)
  1. Peel and devein the shrimp.
  2. In large pan enough to hold the shrimps over medium heat, add the olive oil and butter. Heat until butter melts and is foamy.
  3. Add the onions, garlic and lemongrass. Fry until fragrant.
  4. Add the shrimp heads, gin, thyme, paprika and chilli flakes. Season with salt, pepper.
  5. Add the shrimps and cook until it becomes pink. Remove from heat.
  6. Slice a pan de sal in half. Brush it with the garlic oil and toast until slightly brown. Do not allow to burn.
  7. Serve hot and enjoy!

I received an email a few days ago from Kristina, an editor from Be @ Home, part of Become.com‘s blogging network. She told me that they wanted to give my blog an “Editor’s Choice” award! I was floored! You can see the badge on the sidebar, below my other foodista recognition. 🙂 

Inasal

What do you do when it’s the first week of November, you have a ton of Christmas lights and a reasonably tall tree? – Hang the lights on and around the tree and grill like you’ve never grilled before of course!

We (my family and I) get to celebrate our first real Christmas this year in our new home so we wanted to make it special. Yes, this is how excited for Christmas we are. In our household, barbecue is special.

There’s barbecue and there’s barbecue. I’d like to believe what I did falls under the latter because I didn’t make the run-of-the-mill barbecue (meat+ketchup+soy sauce+vinegar+brown sugar)………..I made Inasal. *Cue gasp*

It was a lightbulb moment for me when I was juggling ideas for my barbecue. I really like the taste of Inasal – salty, sour, smoky, with a hint of sweetness. Mang Inasal’s variety is smoky and sweet and I enjoy drowning the chicken thigh (my all-time FAVORITE chicken part) in soy sauce, vinegar, chili and atsuete/achuete/annatto oil. Pure bliss.

I’ve always been curious how they make authentic Bacolod Chicken Inasal. I was perusing recipes and blog posts and it turns out, Market Man and Jun Belen have their own recipes for Chicken Inasal. They have the same components, albeit in different proportions: citrus juice, vinegar, garlic, ginger, salt, pepper, sugar and lemongrass.

Market Man swears that authentic Inasal (from Bacolod) is basted with a mixture of Star Margarine, achuete oil and pepper. One thing that’s striking with Inasal is the absence of soy sauce in the marinade. I guess it’s reserved for the dipping sauce then.

What I did for my version:

1. I went crazy with the garlic and ginger. And yeah, that’s one long lemongrass stalk.

2. I toasted the garlic and ginger from the marinade with the melted margarine, and then I added the achuete oil and the pepper to make the basting sauce. I alternately basted the meat with the achuete margarine mix and the marinade while it was grilling. Liquid gold.

3. I used chicken and pork

And let me tell you…..It tasted amazing.

Holy mother of god it tasted amazing!

I kid you not – I think I started a whole new family tradition when it comes to grilling. It was everything I could ever look for: salty-sour, smoky, succulent meat. The lemongrass imparts a fresh, citrus-y scent to the meat that makes it all the more indulgent. I didn’t even see the need for a dipping sauce.

Will I ever get to truly taste authentic Bacolod Inasal? Well writing this made me realize I should put that on my bucket list. Or better yet, make a totally new bucket list devoted to food! But for now, I’ll gladly settle for this recipe. And I say that with the most satisfied smile in the world.

Chicken (and Pork) Inasal (serves 6 – 8 )

because we have huge appetites, adjust as needed

6 – 8 pieces chicken leg and thigh + 1 kg pork belly

Marinade

  • 3 bulbs garlic (minced; you can use a food processor)
  • a 3 inch knob of ginger (minced; you can use a food processor)
  • juice of 4 lemons
  • 3 / 4 cup vinegar (I used apple cider vinegar)
  • 2 tablespoons rock salt
  • 1 tablespoon freshly cracked pepper
  • 1 lemongrass/tanglad stalk, roughly chopped
  • 1 tablespoon sugar

  1. Mix all the marinade ingredients together and adjust taste to your preference.
  2. Add the meat and marinade for at least two hours or overnight.
  3. Grill the meat, alternately basting with the achuete-margarine mix and the marinade. Be careful not to let the meat burn.
  4. Serve with a steaming cup of rice. Dipping sauce (soy sauce, vinegar, chili) is optional. Enjoy!

for the Achuete – Margarine mix

  • 1/4 cup vegetable oil
  • 3-4 tablespoons annatto/achuete seeds
  • 1 small tub Star Margarine (get the smallest tub out there)
  • two spoonfuls of the garlic and ginger used in the marinade
  • 1/2 tablespoon freshly cracked pepper
  1. In a small saucepan, heat the oil. Add the achuete seeds and allow oil to color. Once the desired rich orange color is achieved, remove from heat.
  2. Strain the oil into a cup to remove the seeds.
  3. Using the same pan, melt the margarine until hot and frothy.
  4. Add the garlic and ginger and allow to toast. Add the pepper.
  5. When done, remove from heat and use it for basting the meat.

Breakfast Amazes Me

Trust me when I say I’ve never been a breakfast person. Yeah yeah, it’s the most important meal of the day and studies have shown that people who eat breakfast are healthier than those who don’t blah blah, but skipping it seems more convenient. I had this mindset when I was younger that as soon as I wake up I had to get ready for school. I hated being late, so I never really gave breakfast a thought when I was still studying.

Now that I’m a few months fresh from college graduation and working part-time as a teacher, well, it’s enough to say that (finally) I have enough time to eat in the morning. My classes are all in the afternoon, so I practically have the whole morning for breakfast or brunch.

I’m basically an instant oatmeal from the sachet kind of the guy. I don’t like to think about what I’m going to eat nor do I want to stress myself with prepping a meal when I’m not in the mood, which is most of the time. It’s a good thing my aunt usually who cooks for my grandparents has been taking the cudgels of preparing our meals ever since I was born. BUT when I do get inspired, I do try to pay homage to the breakfast gods by producing a decent crazy amazing breakfast fare.

And this morning I was pretty lucky to get the best of both worlds: I didn’t have to think about what to eat AND I had a really perfect rustic breakfast. Mom came home from Manila and brought back a small box full of frozen Ilocos longanisa! I’m not sure if it’s the Lucban variety, but I’m a fan.

I cooked it by first adding water enough to cover the bottom of the pan with the longanisa for it to steam and/or slightly boil. Cooking it that way first makes sure that it cooks evenly. Then when the water evaporates I add a tablespoon of oil and I just let it brown and let the fat render.

This is actually where the magic happens – literally. At this point, oil splatters practically jump out of the pan in any direction, causing the mildest form of pandemonium in the kitchen. It’s amazing that I really wake up at that point. After around 2-3 minutes on both sides, the smell just wafts up my nose and makes my stomach guggle in anticipation, nevermind that I got burned by the oil.

When it’s done, I eat it with rice and I’m instantly in heaven. What I love about Ilocos longanisa is that it’s unpretentious. It doesn’t taste like it’s been through hell and back with preservatives. It’s not sweet AND IT’S LEAN because the fat just renders off perfectly while cooking. I can taste the garlic, and holy mother, it’s GARLICKY. It has the perfect blend of salty and sour, which compels you to eat it with lots and lots of rice. OK, I exaggerate, but that’s just how good it is.

I’m juggling a few ideas as to what I’m going to do with it next. Pasta, pizza, panini…..and ice cream? (haha) That’s how inspired I am this morning.

And doughnuts for breakfast? I’m really not a fan of doughnuts….but maybe for lunch i’ll make an exception. 🙂

Garlic and Sardines Pasta (comfort food)

What is it about comfort food that hits the spot in so many ways? Well, it is supposed to give you that sense of security, that warm fuzzy feeling of being right at home, no matter where you are. That’s what drives me crazy about food – good food almost always brings with it a good emotion. I like cooking food that makes me feel fuzzy all over. Yeah I know, corny, but pfftt to you, I’m on a roll.

I came home from a busy day at work and I found myself not even bothering to change into comfier clothes – I just opened my pantry, looked around and did a mental inventory of the ingredients I needed and I started prepping for my dish of the moment – Sardines Pasta. I’m partial to the Spanish style variety,  with that perfect blend of meaty fish, succulent oil plus the perfect amount of heat. The tomato sauce variety, I don’t really care for.

Like I said, it’s fairly simple, sometimes I’m even tempted to just dump it over cooked pasta and let the magic just melt in my mouth. Yeah you can that too if you’re lazy as me on a perfectly rainy day, but I like mine GARLICKY, and so I cook A LOT OF minced garlic in the sardine oil first, to impart that “Holy Mother I’m salivating” feel. Once that amazing garlic smell wafts around the kitchen, I add the sardines, with each piece roughly sliced into three smaller pieces.

I don’t know if it was Rachael Ray or Giada who introduced me to the idea of adding a little of the starchy liquid used to boil pasta into the sardines mix – but man, it works like a charm. After adding the pasta (drained of course) into the mix and letting the components get to know each other, there’s always that film of oil that coats each noodle perfectly.

Tasting it is a whole different story – well, more like an epic. There’s the perfect blend of salty meaty crumbled sardines + the oil coated pasta + the right amount of heat that just makes my knees go weak. My mom insists I add cheese to the pasta, and I can’t say I disagree with her but I like mine really aglio olio. But what the heck it tastes good just the same.

You can never really go wrong with perfectly toasted garlic. For real. That’s why I love being Filipino. We put A LOT OF garlic into pretty much anything.

I’m really not much of a food stylist. Consider this…pretty rustic, just the way comfort food should be. And consider me…rationalizing. But seriously, it is comfort food!